All the information you need about designing custom coins is in one place

Making challenge coins is a lot of fun, but before you start, there are a lot of things to think about. We’ve been making custom coins for a long time, so we’re happy to help you every step of the way.
This guide on how to design challenge coins will tell you everything you need to know. Whether you’re new to the game or just want a refresher, these steps will help you turn a simple idea into a design for a challenge coin that will stand out.
Step 1: Thinking of an idea
Every idea for a challenge coin starts with just an idea. We offer free artwork and changes, but we can’t start making your coins until you tell us a little bit about what you want.
So, coming up with an idea is the first step in making a challenge coin. Think about what you want the front and back of your coins to look like. Who are the coins for, and what will they be used for? Which colors come to mind?
These questions only skim the surface of what your coins will represent and how they will look, but they are good things to think about when you’re starting out. Some of the best designs for challenge coins feature logos, mascots, and catch phrases, but we can make almost anything you can think of.
You can get ideas from places like Google Images, Pinterest, Shutterstock, or even our gallery of challenge coins. Once you have some concepts and pictures, share them with us and write down how you imagine the finished coins to look.
The best way to show us what kind of art you have in mind is to make a quick sketch. You don’t need to be an expert artist. We just need to be able to see how you want the text and art on the coin to be laid out in general.
Step Two: Choose a design for the challenge coin
While artwork is made up of things like logos, text, and pictures, the layout of your coins is formed up of things like size, shape, metal finishing, edges, and other parts of how coins are made. With the custom different designs we offer, you can mix and match colors and textures to change how your coins feel and look.
There are many ways to make a custom coin, but the best place to start is with the size and shape.
Size and Shape of Challenge Coins
Most challenge coins are 1.75 inches in diameter, which is about the size of a golf ball. However, 2″ coins are more trendy every day. Many people find that the extra space on a 2-inch coin gives their original art room to breathe, even when the text goes all the way to the edge of the coin.
Challenge coins could be as little as 1.5″ in diameter. But it’s hard to put artwork and text that can be read on coins smaller than 1.5″. If you want a custom golf ball marker or an extra small challenge coin, it’s best to keep the art as simple as possible so that it shows up as clearly as possible.
If you want something bigger than usual, you can get something called a “oversized challenge coin.” These coins start at 2.5″ and can get as big as you want. Our biggest coin was 9 inches long and weighed more than three pounds.
When you know how big you want your coins to be, it’s time to choose their shape. Not every coin is a circle. Some are oval, square, or angular, some have interesting shapes with grooves and cuts that make images that are unique to each person.
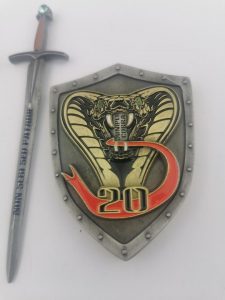
a multitool and a bottle opener.
If you want a bottle opener coin or a coin with more than one use, it’s likely that your design will need a custom shape. It’s not always like this. Some bottle opener coins are round and have a hole in the middle where a bottle opener hook would go. Others have hooks that open bottles in interesting and unique ways. Multi-tool coins with screwdrivers, bottle openers, and spanners will always have a custom shape of some sort.
Choosing a custom shape will go a long way, whether you need a design for a challenge coin that works or you just want to make a design that needs to stand out. You can pick from a variety of standard shapes, or you can request a shape that isn’t available anywhere else. All that matters is what you think looks best.
Once you’ve decided on the right size and shape for your coins, it’s time to start thinking regarding how they should feel.
Weight and Texture
When making a challenge coin, it’s not just about how it appears to look. Also essential is how a coin feels in your hand, with its weight and texture.
A few of the best ways to improve a design that people will remember is to change the weight of the coins and the texture of the background. There are a few ways to change the weight and feel, and the first is to change the thickness.
How Big Should The Coin Be?
The thickness of most challenge coins is 3 mm. Sometimes you’ll see challenge coins that are 3.5 mm thick, but most coins are made to our standard to be 3 mm thick. This gives them a good weight and a solid feel, but if you switch from a 3mm coin to a 4mm coin, your design will be 33 percent heavier. Heavier coins feel quite precious and sturdy. If you want your challenge coins to make a big impression, you don’t have to get a big 3″ coin. Instead, you can make the design thicker.
One other good way to build coins to feel unique is to give them a different background texture. We’ve made coins that look like brickwork, stippling, and even fish scales.
A Coin’s Texture
Adding 3D art to your coins is one of the finest ways to change their look. 3D coins have an infinite number of raised and recessed levels, while 2D coins only have one of each. The sculpted artwork on 3D coins gives it amazing depth and dimension and changes how the surface of the coin starts to feel.
The artwork on 3D challenge coins can have all kinds of shapes and textures, and the level of detail is unmatched. If you like the way a 2D coin looks, there are still many ways to design a beautiful coin. It depends on what kind of design you want for your challenge coin.
After you choose the diameter of your proof, the back texture of the artwork, and whether you want a 2D or 3D design, there are only a couple extra things to do in the coin design process.
Adding Color To Your Challenge Coin
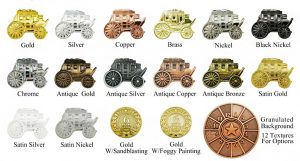
With these last few parts of designing a challenge coin, everything will be done. Think about whether you want color on one side, both sides, or neither side. And you should also think about what colors you want to use in your design. We have soft enamel, hard enamel, translucent enamel, matte enamel, glitter enamel and glow enamel. In the same design, you can use as many different kinds of enamel as you want.
Coins Customized Uses Pantone Colors
Colored enamel and metal platings are paired well together. For example, gold and silver that have a high polish look better with darkened enamel colors that cut down on the glare from the shiny metal. On the other hand, black metal coins look best with white and yellow enamel colors that make the proof “pop out”.
Gold and silver plating with a high polish are our most popular options, but there are so many more. Because they are so rare, antique metal and antique copper are two of our favorite ones. Antique metal plating has a deep color that makes even the smallest design details stand out.
Another thing to remember is that the same coin can have more than one type of plating. Gold and silver are always fun to use together, but there are a lot of other ways to put them together. Some of the most interesting designs we’ve seen combine black metal with silver or antique gold with antique copper.
Edges are the last idea to consider. Sometimes a simple flat edge is all you need, but if you want to frame your art with something a little more fancy, we have a lot of choices for you to choose from.
Choose Your Coin Edge
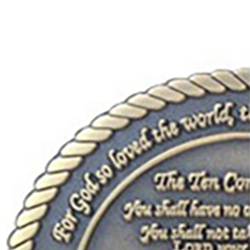
Cross-cut and oblique-line challenge coins have a different texture that changes how people handle them. Our production team cuts them by hand with a machine, which makes them feel almost sharp. Most people feel like they should be handled carefully, but there’s no need to fret. They’re not in any danger.
So, that’s it.
This may seem like a bunch to take in at once, but it’s not hard to understand. All of it comes from your own ideas and inspirations, and the rest usually works out on its own. If you don’t know which option you like best or if all the options make you feel overwhelmed, just let us know. Our sales staff is happy to give you ideas and give you more examples to look at.
As long as you have a clue, the last step in making a challenge coin is easy. Putting in a request for pricing and artwork.
Step 3: Ask for artwork and changes
The last step is to design a challenge coin is to ask for artwork and changes. At Coins Customized, we offer free artwork and free changes as many times as you want. Some other companies that make challenge coins say that the artwork is free, but then they charge for every change that needs to be considered to the design. Before you start, make sure to ask your challenge coin maker what their rules are for artwork and changes.
Since we’ve been making custom coins for over a decade, we know that it’s pretty rare to get the design right the first time. Because of this, we’ve always given free changes. We’re happy to help whether you want to make small changes to several proofs or 10 changes all at once.
So first, you need to fill in a form on our website that says you want to place an order. On the quote form, you could choose options like size, edge, metal plating, and more. There is also a place for you to upload any artwork or other materials you have ready. We’ll take Google images, hand-drawn sketches, bullet-pointed lists, and just about anything else that will help us understand what you want the coins to look like.
Check Spelling & Colors
When you get the first proof of your artwork, check things like the colors, the edges, and the spelling. If you think that some parts of the art could be bigger or if you think that the text on the design would look better in a different font, please let us know. We’ll make a second proof so you can see how different it is from the first.
Once the proof is perfect, the process of making a challenge coin is over. You only have to order your coins.
Find out what your choices are and make a challenge coin today!
This guide has a lot of information, but you don’t have to feel overwhelmed. Our purpose is to support you make your dream come true, and we can use any ideas you have the process involved in designing a challenge coin will go much more quickly if you know what kind of art you want on it and what size, plating, and edges you like best.
You got everything you need to get started if you have an idea. Reach out to us if you have any questions or want to make your own challenge coin. We want to help.


